Saturday, July 29, 2006

I-Joists and SIP Rim


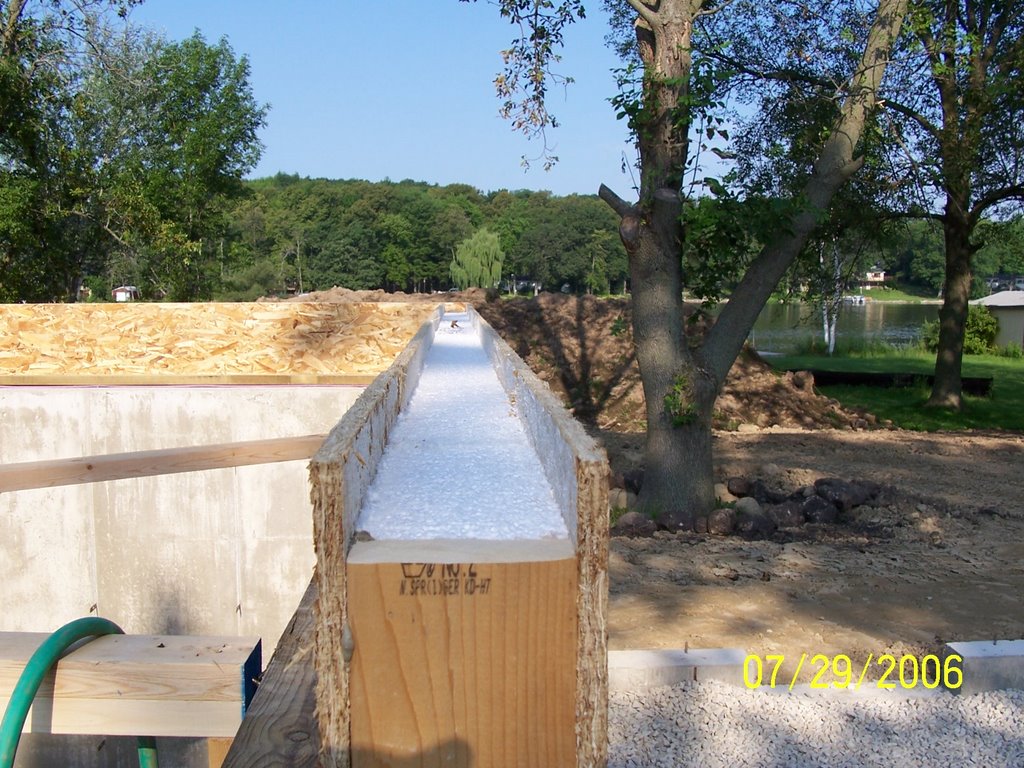
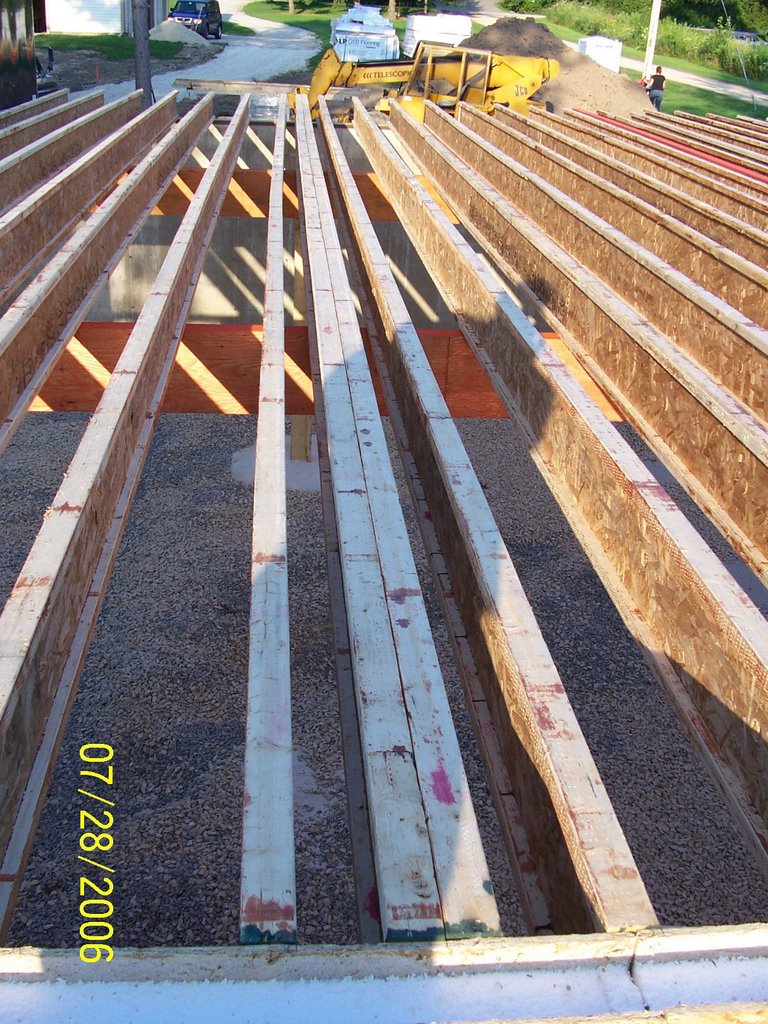
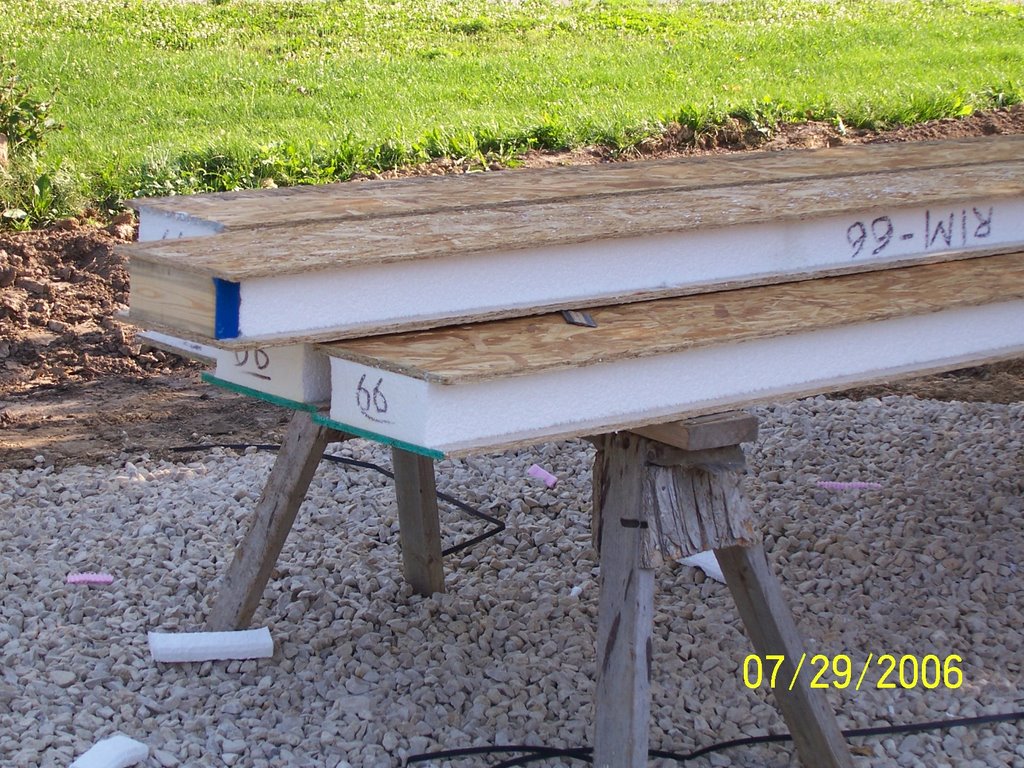
They started by installing the SIP rim on 3 sides. It straddles a 2x4 that is glued and nailed to the sill plate. Nails are then driven through the OSB flange on the SIP into the 2x4. Next, they slide in the I-Joists and cut them to length.

The double LVL in the floor system will carry the load bearing wall that extends up to the clerestory windows and uppermost roof. The doubled I-Joist will carry the post that supports the sitting area of the loft that overlooks the great room. I mentioned mistakes in the original engineered floor layout and those were it.

In the original layout, the LVL was missing and the loft sitting area support post carried down to another post in the basement. The missing LVL could have been a real problem and should not have been missed. The post, in my opinion, was more of a "cop out" on the part of the floor designer. The sitting loft is small, carried to the foundation on almost 3 full sides, and is a "floor load" only. The double I-joist removes a post from a bad spot in the basement and is more than sufficient to carry this load.

Sill Plate and Basement Beams


These are the two main load carrying beams in the basement. The lumber yard sent the wrong length steel columns so the beams are on temp supports for now.

The small walls will support/surround the nested stairs and those rest on those single course of block I mentioned in a previous post.

Not as visible here is the treated sill plate. The builder installed it on some pink foam sill seal and took the extra step to tapcon it down to the inner wythe (there were regular anchor bolts in the outer wythe). The specs for the Thermomass wall call for only a 2x6 sill plate, but I bumped it up to a 2x10 since we are using a 4-1/2" wide SIP rim board.

Wednesday, July 26, 2006

2.5 days to backfill


We should wrapup bacfilling/rough grading today. It has taken a bit longer than expected for a couple of reasons. Primarily, there has been a lot of fill to bring in. Not only do we have a lot of the basement exposed due to the high water table, but we are taking this opportunity to resolve some drainage issues.

When I get the bill for all of the gravel and fill hauling, I will post the number of loads. I have a feeling it is going to be a large number. We hope it is not too much of a budget buster. The other reason is that the truck hauling the fill got a flat tire yesterday.

There have been a couple of other minor bumps in the road that had to be addressed, too. There were mistakes in the engineered floor layout I only discovered the day before yesterday (and framing stars today). I was never given that layout drawing, but I did find it in the materials with the lumber delivery. Mainly miscommunication issues, but one or two were plain-old "the floor guy didn't read the plans close enough". Luckily, none of those issues should hold us up.

Also, in a minor panic, I realized/remembered that there are some short load-bearing walls in the basement. (If you want to go back and see the plans, they are the walls that support the stairs.) In any event, the slab in the basement has not been poured yet, so there is no place to build the walls. The footings are there, but those will be covered by the slab. I kicked around a few ideas on how to fix this.

Most options either involved temporary supports or placing treated lumber that would later be encased when the slab is poured. I did not like either of those. What we finally did was lay a single course of 6" block. These block will support the walls and the slab will be poured around and half-way-up the block when the time comes. I think this is the best solution - today we'll see if I set them in the right place ;-)

Monday, July 24, 2006

Porch Piers


How much (many?) concrete block can a husband and wife lay in 2 days? This much. . . not bad for a couple of DIY'ers. We were hoping for "good enough" and I think we did better and got "not too shabby". It is isn't professional quality, but it is level, plumb, and square and there is only 1/4" difference in height between all 4 pillars. As with many projects like this - skills improved during the course of the project.

These are the supports for the front porch. We made them out of block for 2 main reasons:
1 - We are going to cover them with cultured stone or stone veneer. The final shape is acheived right away with block. The alternative was to pour tubes and then build square boxes on the tubes and cover them. To me, too much of a hassle and not as good of a base for the stone.
2- I wanted us to have a hand in each stage of the building process. I did not want to take on the whole foundation, but this was something I thought we could handle.

We hope to backfill today so we had to get the level of this block above grade. There will be either 3 or 9 courses of block above this. It depends on if we want the stone veneer to end below the porch , or continue up to the bottom of the taper in the porch columns. We are leaning towards the latter, but that's for a future weekend.

Tuesday, July 18, 2006

Foundation Exposed


Sorry - this post is a couple of days late. The forms actually came off on Monday. The only forms that were pulled on Saturday were the ones on the inside of the outdoor fireplace footing. The mason said that forms inside a small space like that are nearly impossible to remove after more than a day or two of setting.

The mason accidentally installed regular basement windows when the plans were marked for rough openings for some small casements. Since he has to cut them out anyway we decided to make them a little bigger.

The next guy through will be applying damp-proofing coating below the line I put on for finish grade. As you can see we need A LOT OF FILL. The water table is so high and the top soil so thick that couldn't dig very deep. . . . It's not so bad since we had some drainage problems on the lot anyhow. The slope we can establish from here should remedy that problem.

I also need to set lay the block for the porch piers. We may try to start backfill on Friday. We'll see. . . .It's going to be a busy week!

Friday, July 14, 2006

Forms come off tomorrow!


We saw this beautiful site when we came home from work!

(Had to climb up on the wall for some of these pics) The little kickout on the one wall will be support a future outdoor fireplace. Those walls drop 6" down from the basement walls so we can just build the deck over the top until we are ready to build it (read - afford it). We have plans for Soapstone Tulikivi woodburner on the inside someday, too. You can sort of see the footing for that on the inside of the wall.

The original plan was to just have footings and I'd later lay block up to where we need it. A friend of mine (who laid the block for my garage foundation/frost wall) told me, "you'd be a complete idiot to not let him pour that wall for the outside fireplace" and "don't call me for that one!"

They finished off the pads for the deck sonotubes and porch piers, too.

Can't wait for tomorrow!

The Rep and The Mason


Thanks Guys!

More Pour 2

Handy T-Mass Pour Chute V1.1


The mason had mentioned to me that on a similar job he'd done before it helped to have a chute to drag along the top of the forms. The key - according to him - was a 2" wide piece of wood running down the center of the chute. The purpose of the wood was to split the concrete so it did not damage the T-mass panel. You can sort of see it in one of the pictures.

I built this thing based on his description. I thought I'd get creative so I made it with one of the short ends extending down into the form, but with a slot cut into it that straddled the T-mass panel, too. As a joke, I painted an arrow on it to let the guy know that you had to drag the slot ahead of the fill. Well, that didn't work very well. When I tested it, the slot got hung up on the foam so I cut off. Of course, that meant the arrow had to become double ended ;-)

Minor blow out


There was a minor blow out along the North garage wall. Someone either missed one of the wedges in the tie or something knocked it loose. There is no T-mass in these walls and the guys jumped right on it.

The jammed some 2x4's on either side of the blow out; pulled the inside form; shoveled out the concrete; re-set the form; and shoveled it back in.

Pouring continued


They started in a corner near the garage - keeping the height of the concrete balanced on both sides.

After that, they moved to the garage wall.

Pouring the T-mass walls


Here we go - Putzmeister Telebelt in place at about 6am

Last wall forming post


On this picture you can see where the garage wall will run from the corner. If you look back at older posts you will see the floor plans and how the garage depth is the same as the house. The difference in height is necessary because the basement stairs and inside stairs "nest" one over the other. Also, the landing on the stairs from the 1st floor to the 2nd will be at the right level for the bonus room over the garage.

Form Setting Continued


Forming the walls with T-mass


Per the spec sheet for this pour, it started with 2 runs of #4 in the footing. Not that different from a normal footing in this area. They then inserted dowels (short pieces of #4 rebar set vertically) in the footings 72"on center. Those had 8' lengths of #4 re-bar tied to them. There were two horizontal runs of #4 and then another vertical run between the verticals tied to the dowels.

In other words:
two runs of #4 in the footing
vertical #4 32"oc
a low and a mid horizontal run of #4.

The T-mass panels were pre-cut per the form layout submitted by the mason. Those panels had the fiberglass standoffs inserted and locked into place on site - it went very quickly. The corners were precut, too. Those got folded and taped and placed so they didn't spread apart during the pour.

They started by placing some inside forms. Then the T-mass panels were placed and followed by the outside forms. The mason's commented that the standoffs (sometimes) pretty much put the outer wall right on the money for the ties to be locked in. Other times it seemed like the outer form needed a bit of extra persuasion to get the tie wedges in place. All in all it did not seem to slow them down at all.

Wednesday, July 12, 2006

Footings


Ok, granted, footings are not a thrilling step of the building process. However, I do want to create posts for most of the steps, so here it is.

I checked opposite corners with the 3-4-5 method and I pulled diagonals. Not taking into account any stretch on the tape, the footings are within 1/4" or less of "square". We are using the "Form-A-Drain" system in place of the traditional drain-tile set up.(http://foundations.certainteed.com/)

As mentioned in previous posts, this design aims at being "efficient" in many practical ways. By "efficient" we not only meant with regards to energy, but also with regards to construction methods. For example, you can see in these pics that the foundation does not have an excessive amount of corners. The challenge was not only to limit the corners, but to do so without making the design un-exciting. I will touch on points like this again as they come up.

The masons are setting the wall forms on Thursday and we hope to pour the walls on Friday.

Thursday, July 06, 2006

Holes!


From this point on we start bringing things to the site, rather than taking stuff away.