Tuesday, November 21, 2006

A 360 View in the Great Room

The "doorway" in the lower left is the pantry mentioned in the last post. You can see the support post from before, too. The doorways in the loft are the two upstairs bedrooms. We are planning on a cable rail railing to keep the view open. In the upper right you can see the first of three pairs of the Southern facing clerestory windows.
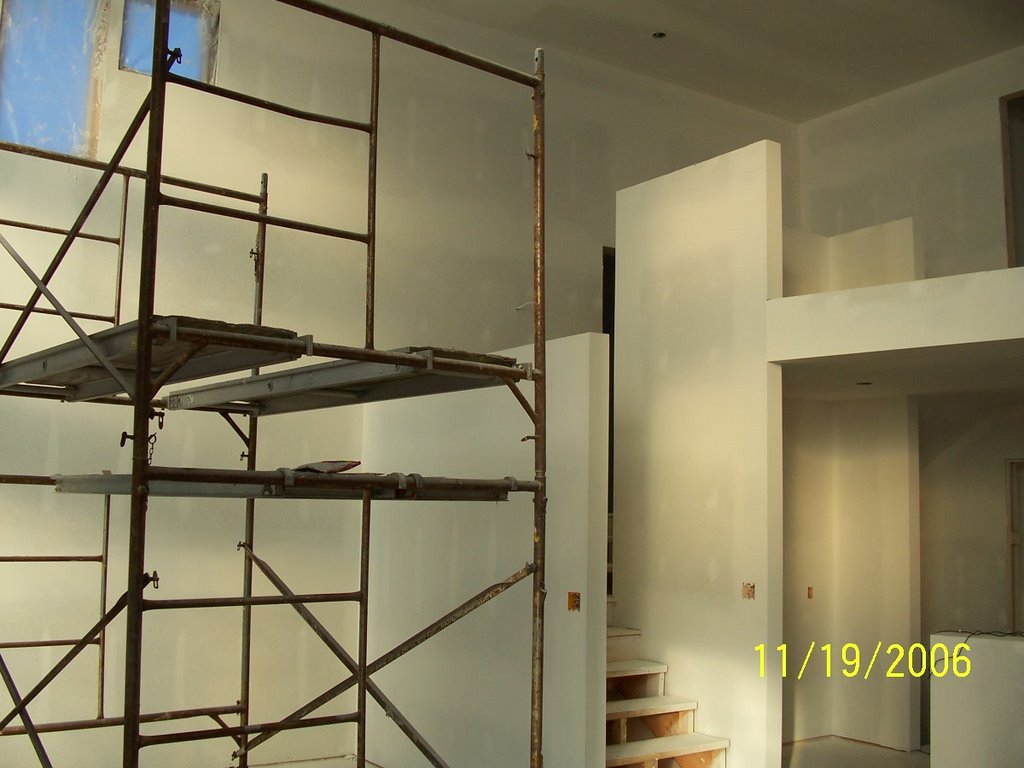


Moving to the left from that photo; you can just make out where the stairs come up from the mudroom. You can also just see the door into the bonus room from the stair landing.
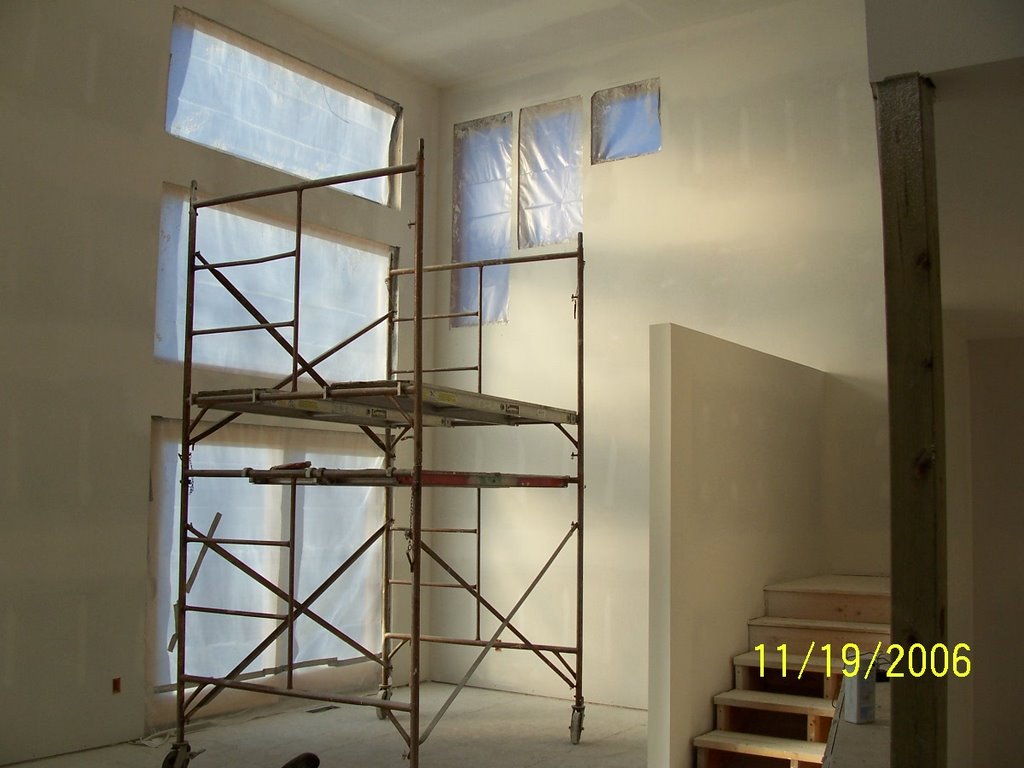


Continuing left, this area will be where we put the dining table.
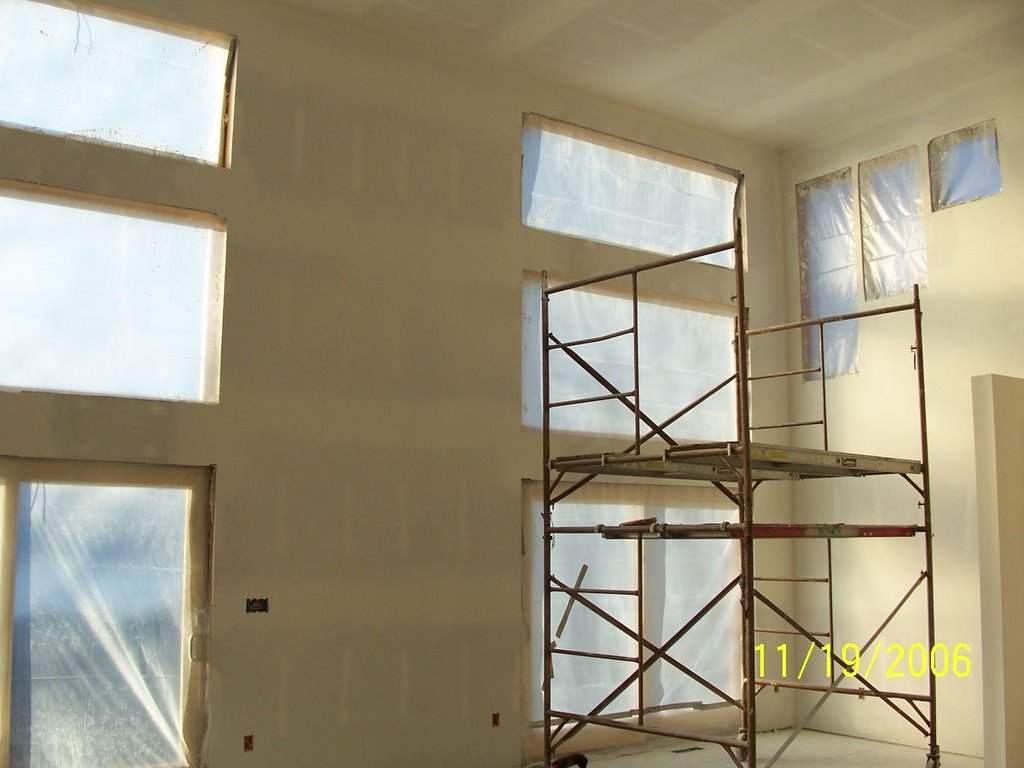


We've "pre installed" a footing under the basement slab directly below the gap between the two large sliding doors. The hope someday is to put a Tulikivi there. http://www.tulikivi.com/www/homeeng.nsf/wwwframeset_lämmityslaitteet?OpenPage


Continuing left, in this picture you can see the recessed outlet for the TV. The plan is to put a flat TV on a heavy duty hinged panel. The panel will pivot the TV out and into the room (sort of towards where the picture was taken from). You can also see another pair of the cleresory windows.

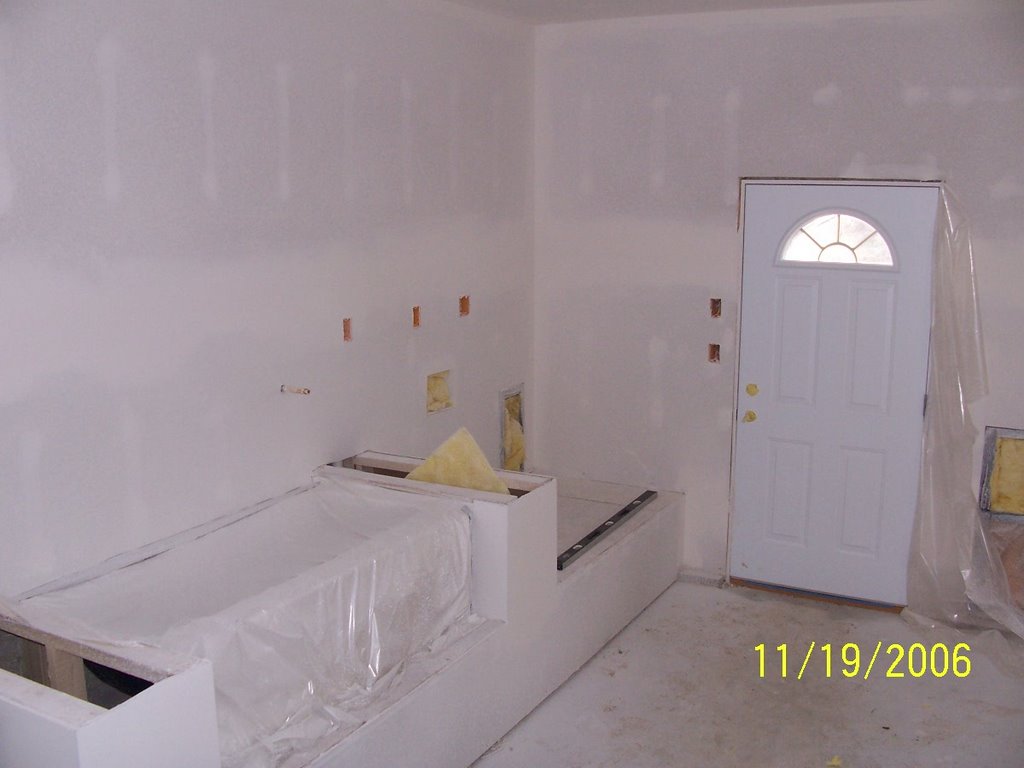
Interior Shots, Mudroom and in to Kitchen

(I need to figure out if there is a cleaner way to do thes layouts. This may be hard to follow. I've done some searching on adding captions but have not found any useful info yet.)
Our primary way into the house will be from the garage into this mudroom. The door at the back of the mudroom leads out to the back yard. You can just make out the dog door to the right of the regular door. The elevated platform will hold the front loading washer and dryer. To the left of the W/D, in lieu of a regular wash tub, is a full size tub for bathing the dogs. Since this is on the same slab as the garage, we were able to include a floor drain. In retrospect, the only thing I wish we'd have done a little differently would be to provide a toe kick in front of the dog tub. We plan on putting a pad on the small ledge to kneel on, but it would have been netter to be able to belly-up. If it is enough of a hassle it will get later modified.
If you were to turn left in the previous picture, you'd be able to enter the stair area to get into the house. Those stairs lead down to the basement or upto the kitchen. This picture is what you'd see if you walked into the stair area and then turned left again to go up to the kitchen. I am sure the small shelf will quickly accumulate the discarded contents of our pockets as we enter the house. ;-)

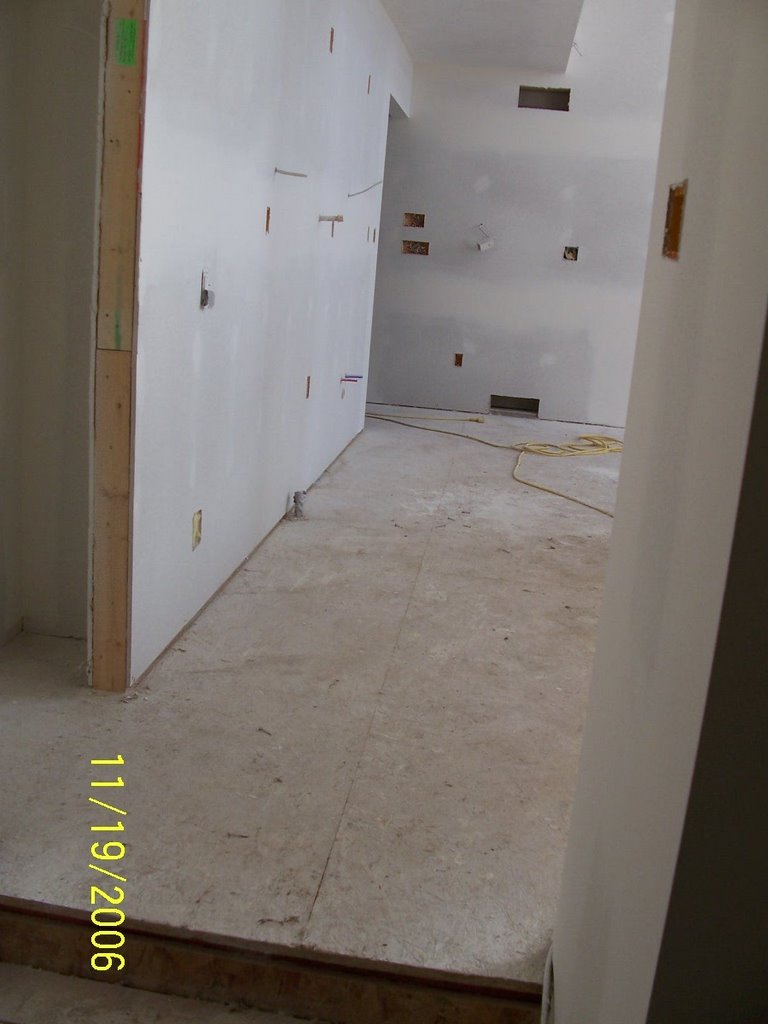
Up the stairs as they curve right and you'd be coming up into the kitchen. The door opening on the left is the pantry and it will get a pocket door. This view will ultimately not be this "clear". You are looking "through" where the fridge will be. (The passageway at the far end of the photo is from the foyer area.) Up the stairs and a slight jog to the right will be the path into the kitchen.

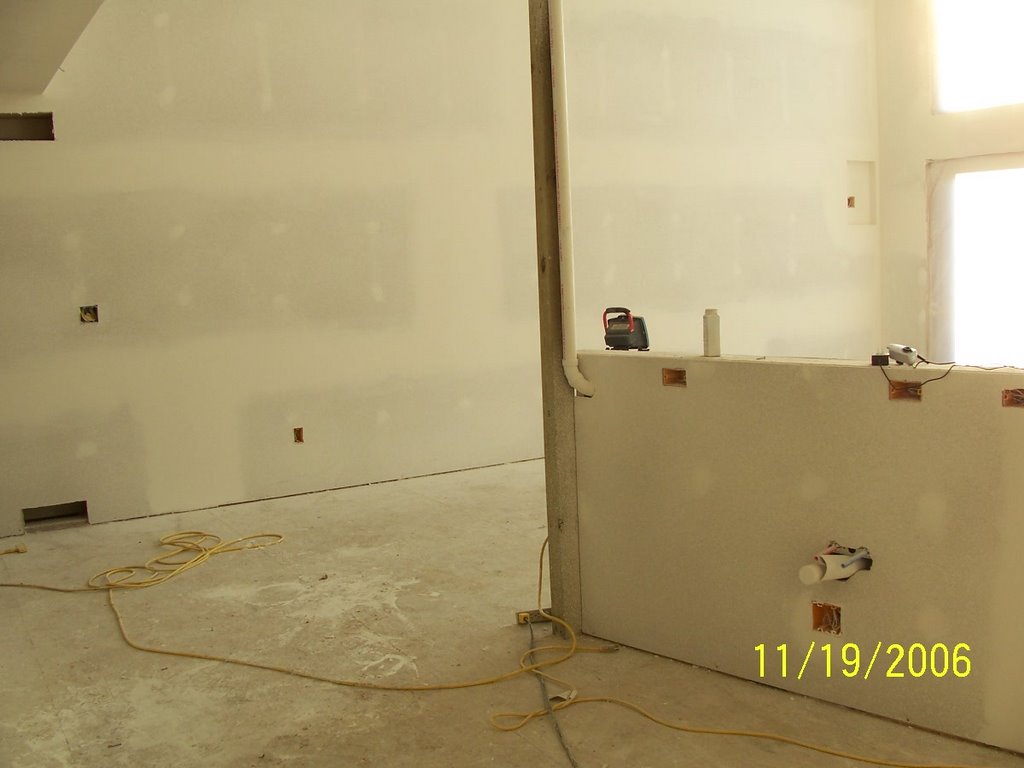
And, finally for this post, this is the view from the back corner of the kitchen, out over the island and into the greatroom. The island will get a sink and a DW. The post will be wrapped with a decorative column.

Monday, November 20, 2006

Retaining Walls


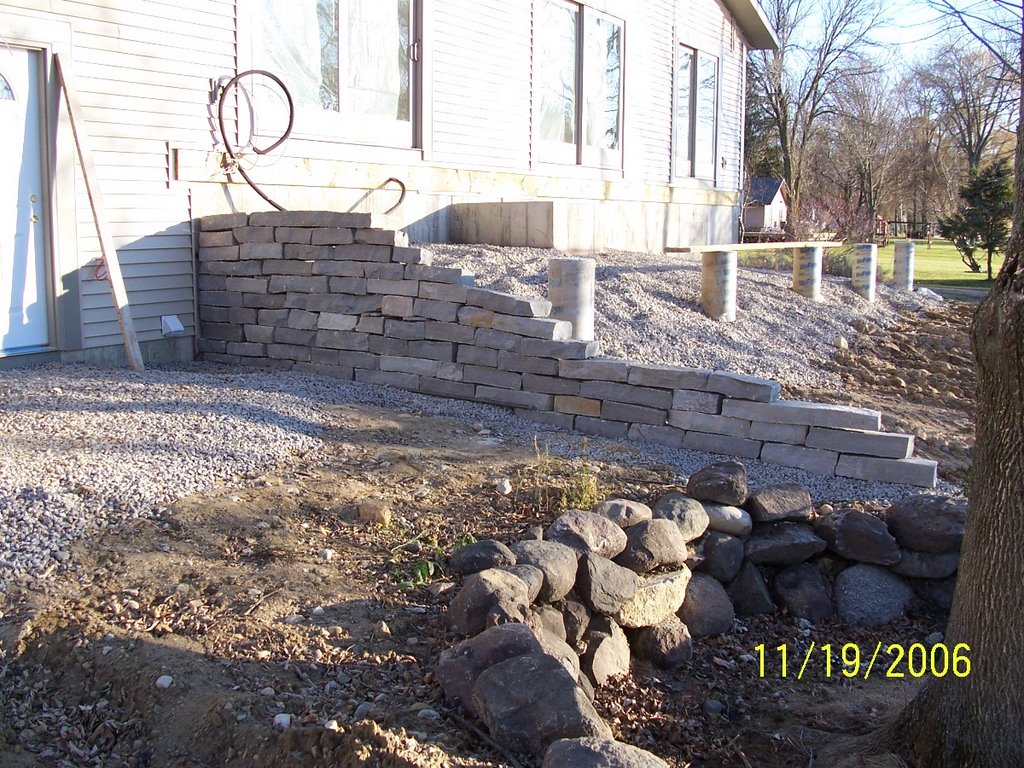
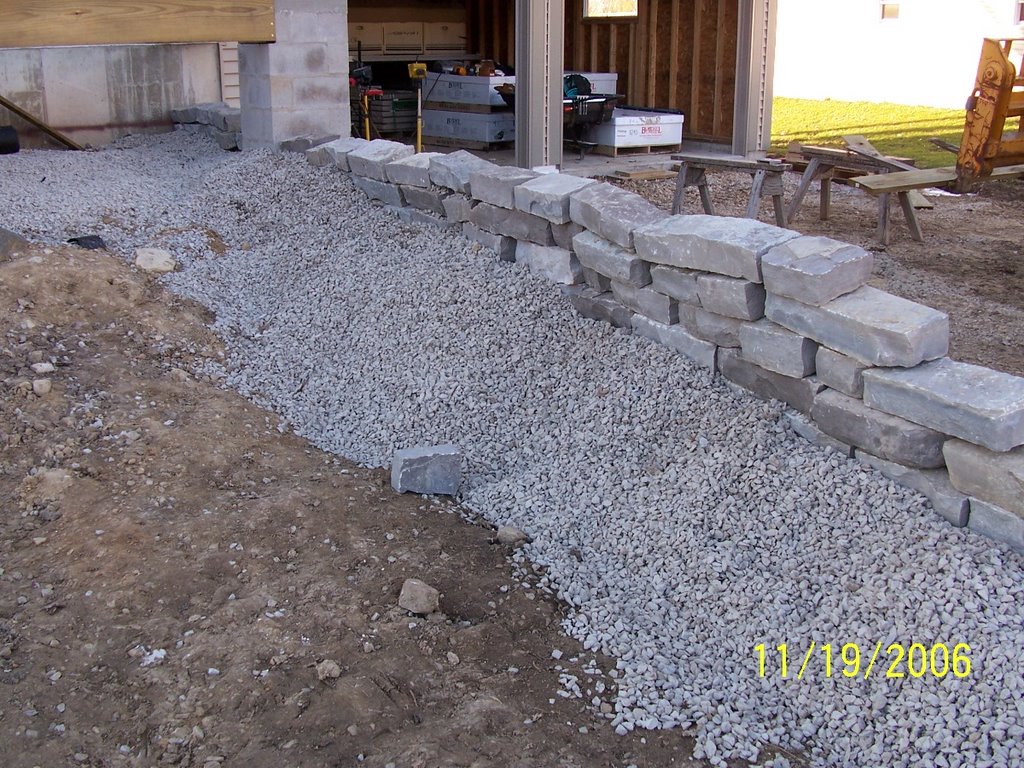
These are necessary for us to get the slope of the final grade as we desire. Stacking up these blocks is not that hard (granted, someone who knows what they're doing could probably get tighter joints, but I think these are OK). I had 4 full pallets to work from, roughtly 1 ton per pallet. I used about 3.5 pallets/7000# of stone.

The hard part is not the stone, but rather the gravel that's piled behind the walls. I had some gravel "pre-piled" by the excavator behind where the wall was to go. However, I had to move about 20 wheelbarrow loads over from the main pile. The ground was sloppy-muddy so I could not take a direct route from pile to wall. That shovelling and transporting was the hardest work of this job. There just was not enough of it to warrant a skid steer rental, but boy what I would have given to have one for just 3 or 4 trips. . . .

We have matching "thin veneer" stone that will be applied to the columns.

For the record: Any variations in wall straightness or setback angle; those aren't mistakes, that's "rustic".

Monday, October 30, 2006

Passed Rough Framing and Mech Insp and Spray Foam Pics


As the title indicates, we passed our rough framing and mechanical inspection today. Now we can get the vapor barrier up and call in the rockers. After that, the'll blow the insulation in the attic spaces and we can fire up the heater. This could happen as early as 5-7 days from now.

We ordered a couple of 600 BF spray foam kits from TigerFoam to do the overhangs. Wow is that messy work! Even with the Tyvek suit and stuff I am struggling through some spot hair removal as I pick the pieces off of my wrists and neck.

Thursday, October 19, 2006

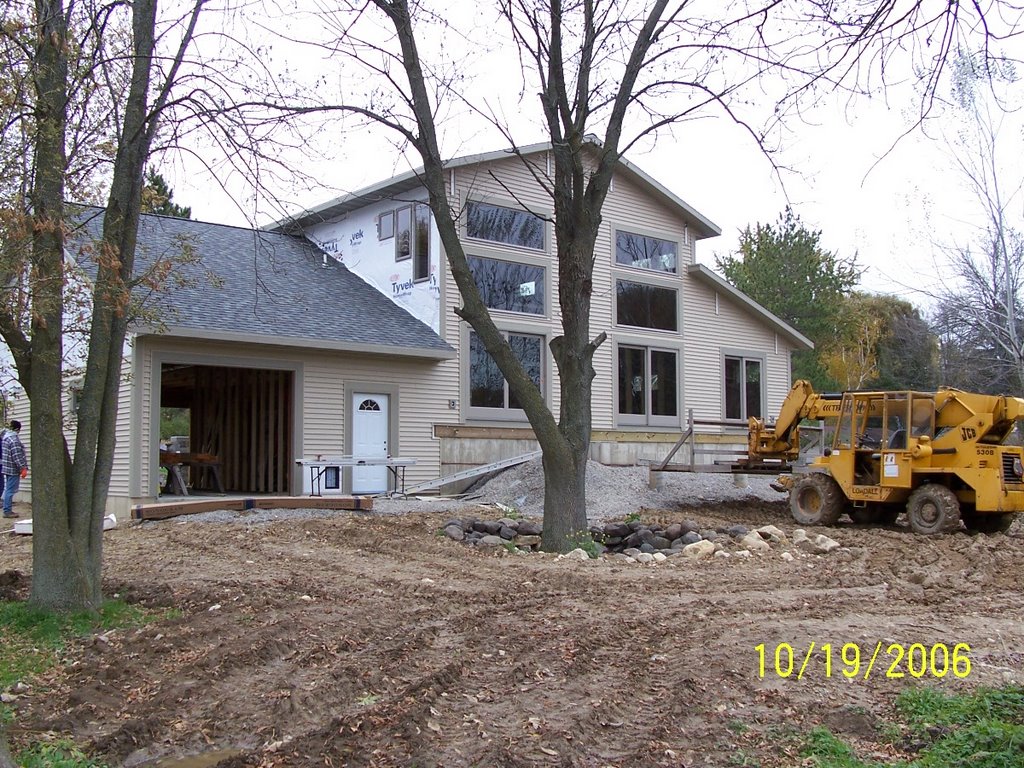
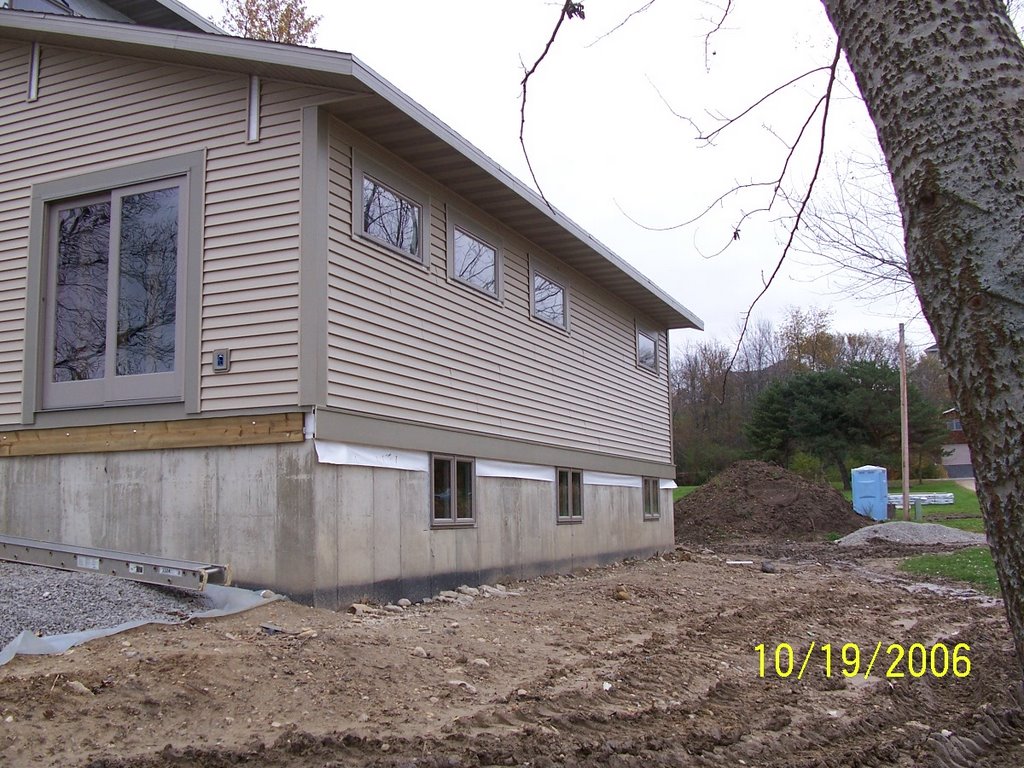
Siding


OK , finally, some new pics to post.

The small open areas in the siding below the windows are for sills and the open areas up near the gable overhangs are for craftsman style brackets.

We might be ready for mechanical and framing inspection by the end of next week. It's getting cold up here, so I want to get moving on the insulation so we can get the heater fired up.

Monday, October 02, 2006

Status Report

There just have not been that many picture-worthy changes, but here is a status report.

The windows all look great. The last windows that need to go in are in the basement. We had made some changes from the orignal plan. We doubled the size of the basement windows by changing the single casements into doubles. I'm not sure what happened, but either I forgot to confirm the order or they never got ordered in the first place. In any event, they showed up today and should be in this week. They will help establish the line for the water table and siding.

We've been prepainting the trim before it goes up. The builder has started on the soffit and fascia. We've placed the ledgers for the front porch and back deck in preparation for the start of the siding. . . Lots of small changes.

We are about 1/3 to 1/2 done with the wiring. I talked with the electrician regarding the general layout about a week ago and have been working on my own pulling wire since then. We will work together on Wednesday. That may do it or I'll try and wrap it up by the end of this coming weekend (I hope). It won't be too long after that we'll call for inspection of the framing and mechanicals - after that the drywall should start.

The next pictures should have a lot of great changes, but that's about it for now. Lot's going on, but not a lot to show for it.

Tuesday, September 26, 2006

Monday, September 25, 2006

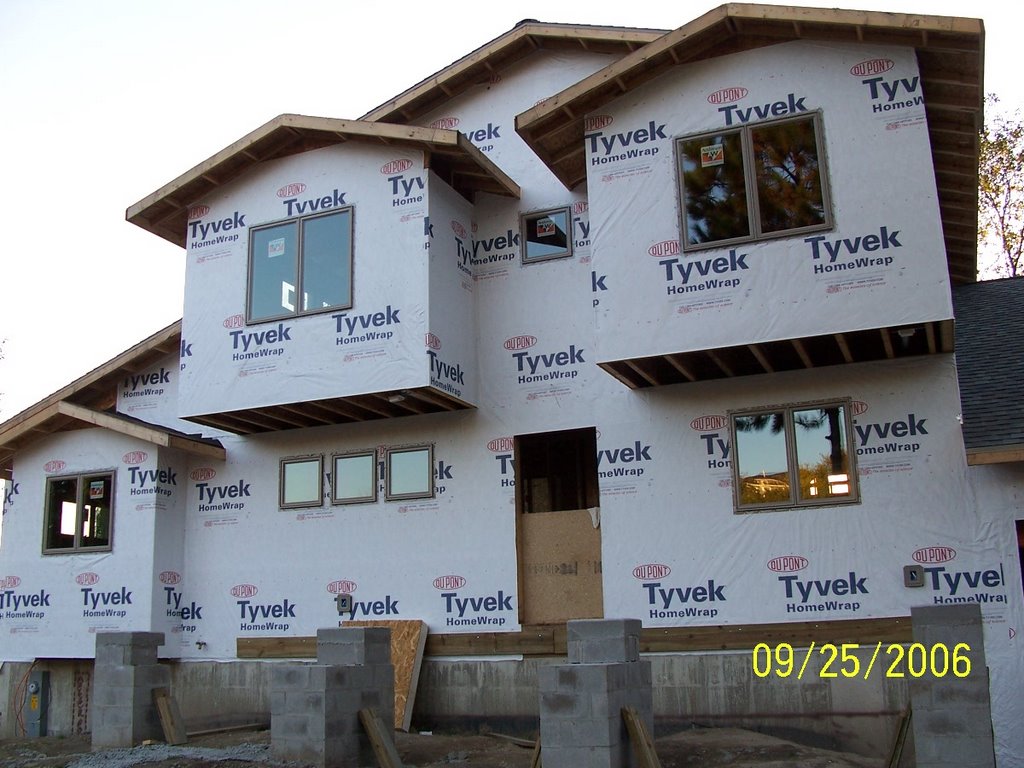
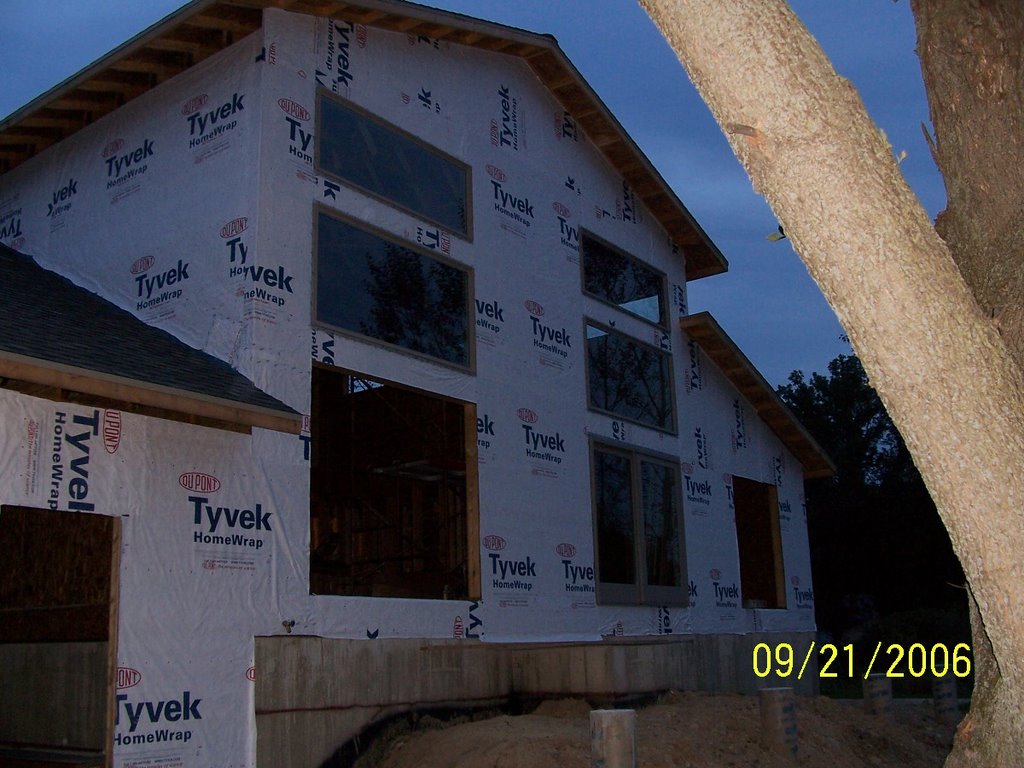
Windows going in and a funny story about "extra" concrete.


Not much daylight left in th evenings . . . .

The windows should all be in by the end of this week. This is exciting because some of the rooms have never even had Rough Openings. Due to the nature of SIP panels, if the load above is below a certain amount, the RO can be cut on-site leaving only 1' of SIP intact above as a sufficient header. These new openings will really let the light into the master suite area and upstairs bedrooms.

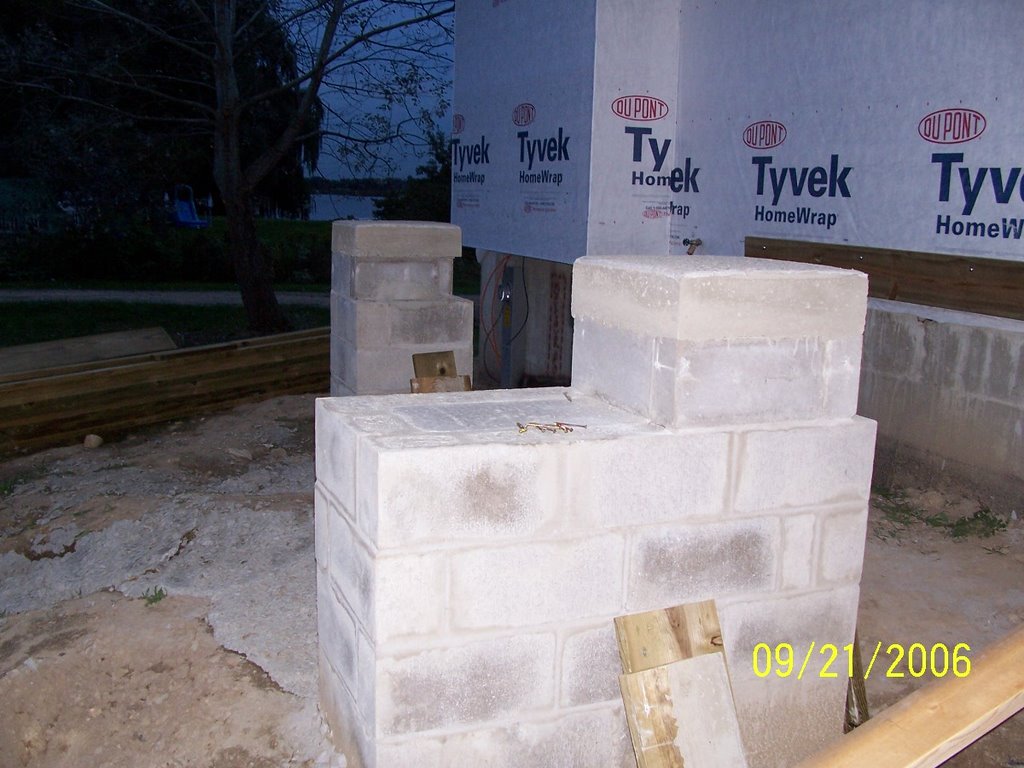
The garage and basement slabs are in and they look great. I told the masons to clean out the truck chutes and dump any extra concrete into the block piers for the front porch. Well, they had enough extra to FILL the two larger ones. I figure they weight about 4000 pounds each now. They are built on a footings 8' down (same level as basement footings), but I sure hope the don't start sinking now! They did the filling the day they did the basement slab, before they came back for the garage, we put 4" block to carry small slabs that will carry the posts to support the porch roof. We formed up those slabs so when we lay the next (and last!) 4 courses, they will start just above the finished decking. I think these are really going to look sharp once the stone veneer (or cultured stone) is applied.

I feel sorry for the poor bastard 50 years from now who says, "lets knock out these piers and change the look of the front porch".

We made good progress on wiring this weekend (see next post) and started painting the trim to prepare for install. A local electrician is advising. I've hired him for consults and a few days of labor; however we'll do most of the wiring ourselves. It will probably be a couple of weeks before we'll call for the next inspection (framing and mechanicals), in the meanwhile, the builder will finish the windows and start on the soffit, fascia, and trim.

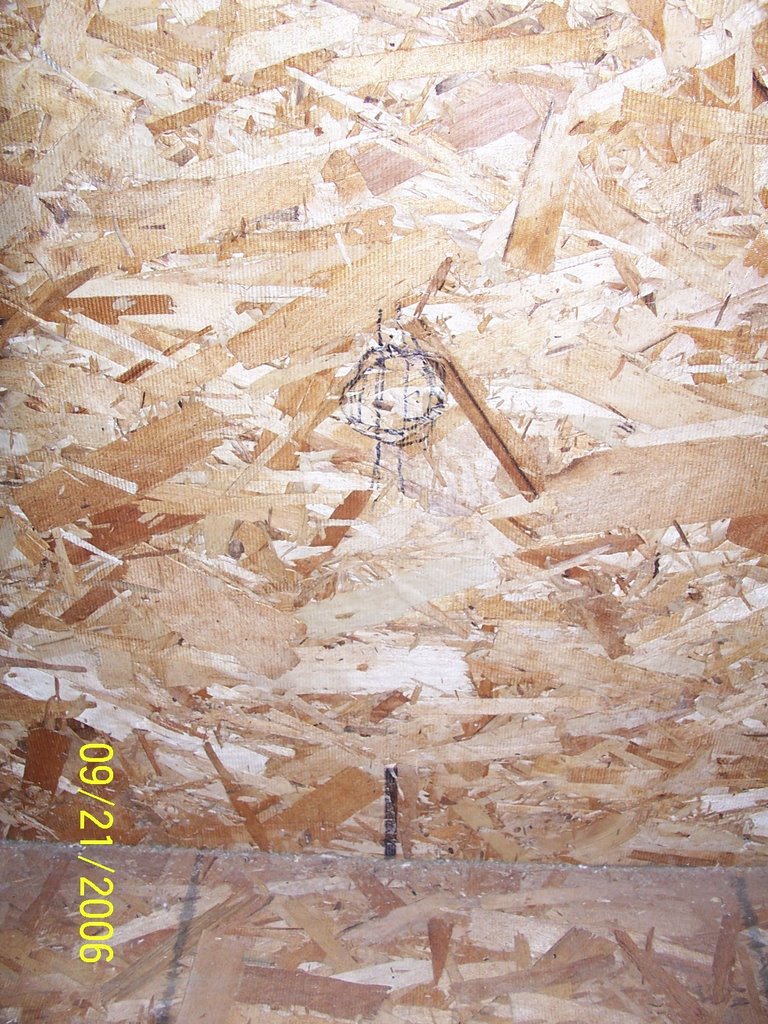
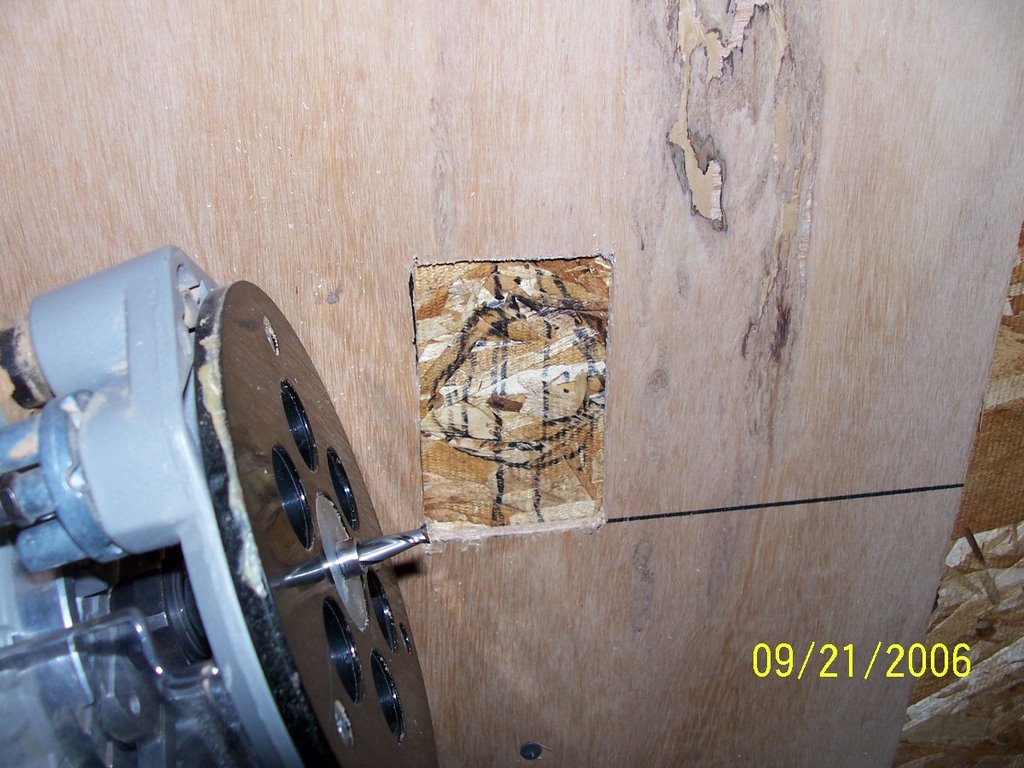
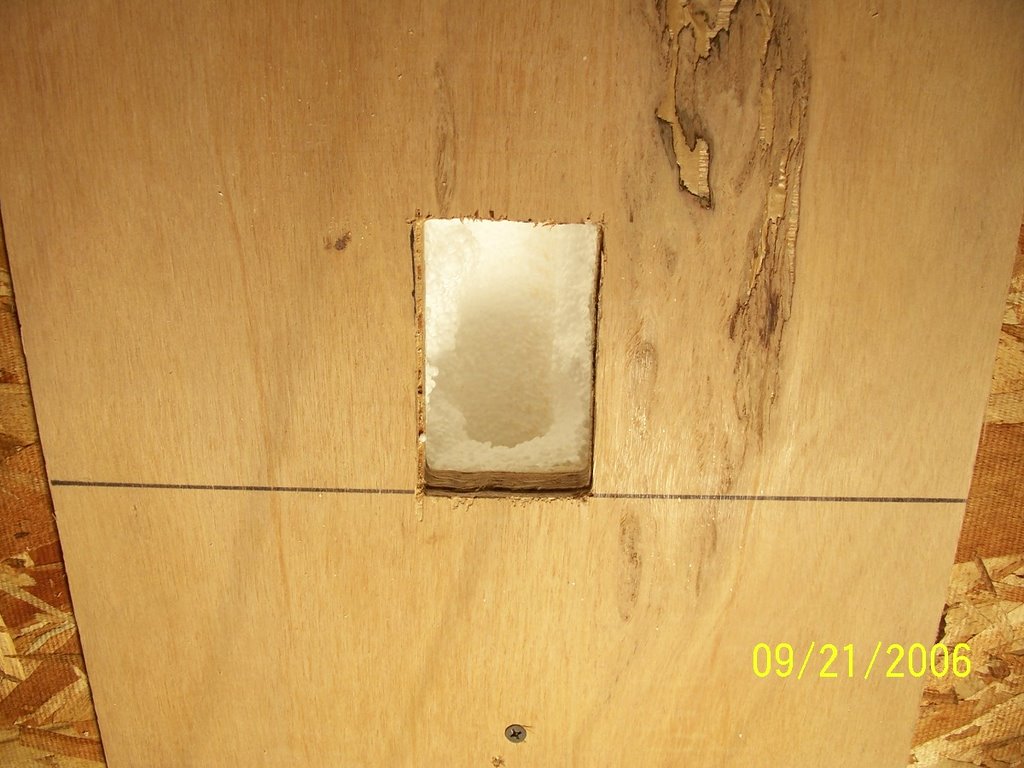
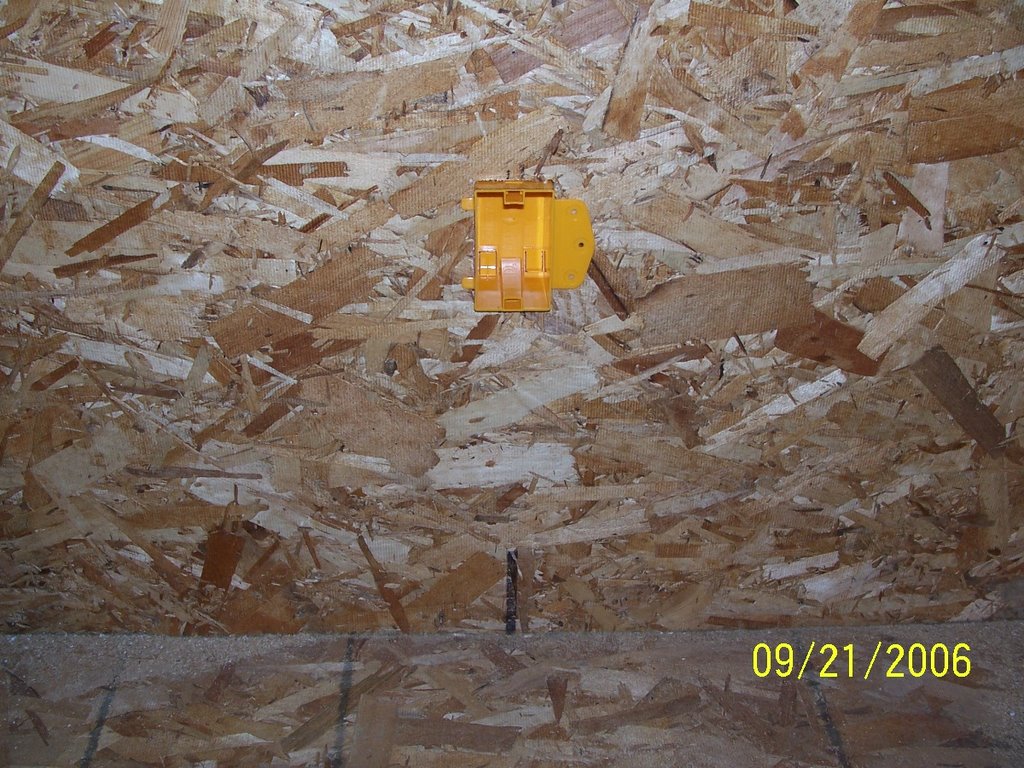
How to install outlet boxes in a SIP walls


During the plan stage, you mark up your drawings with every location you think you might want an outlet or switch on an outside wall. When the panels are being manufactured, they cut vertical chases into the foam at those locations; and then mark the OSB top and bottom. As the builder is setting the panels, we drills holes through the bottom plate and through the top spacer and 2x6.

I made a template for my router by tracing around a face-mount box with a marker. By cutting to the outside of the marker line, the hole is the right amount "oversize" so I can use a collar round the router bit. Here are pics of the sequence during install.

Thursday, September 14, 2006

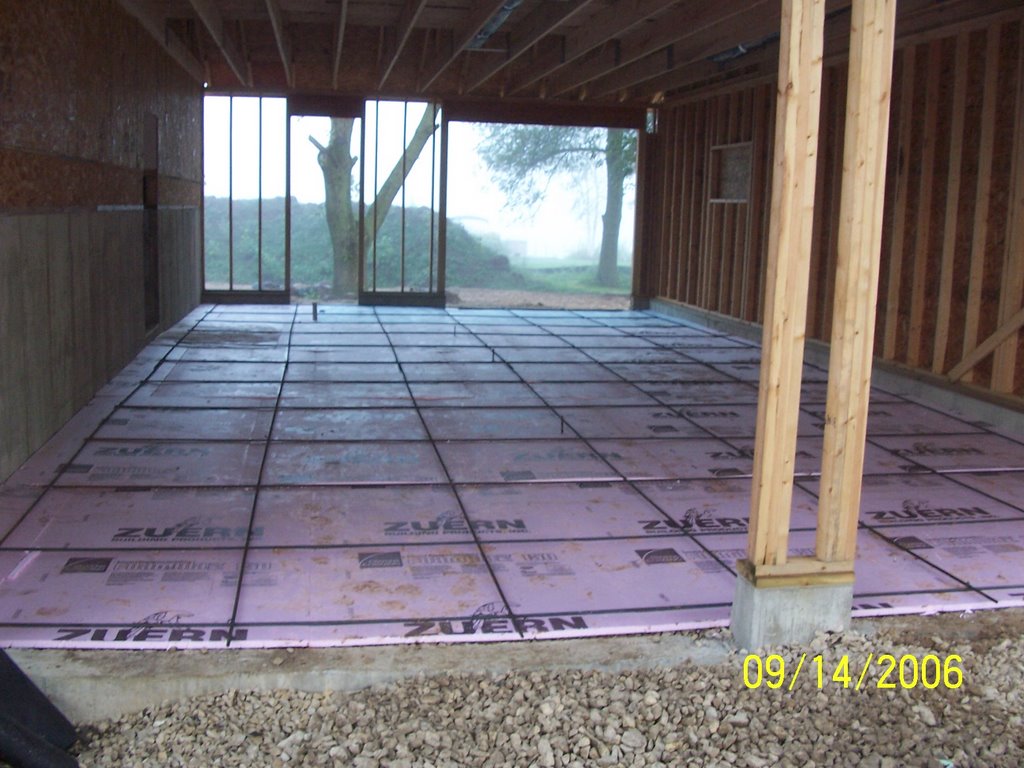
Sorry for the Delay - Mechanicals and Slabs


The shingles have started and the HVAC and Plumbing rough are mostly done. I am not totally satisfied with the mechanicals and am going to try to have a few minor changes made.

The vertical shot shows the HVAC chase looking towards the kitchen and loft. The run on the left is the supply to the bonus room - ot does not go to the second floor, but rather runs through a soffit off to the left. The middle run is the upstairs supply; right is the return.


The other two pics show the prep for the basement and garage slabs. Foam and rebar in the garage; and a rough in for a basement bathroom.

Monday, August 28, 2006

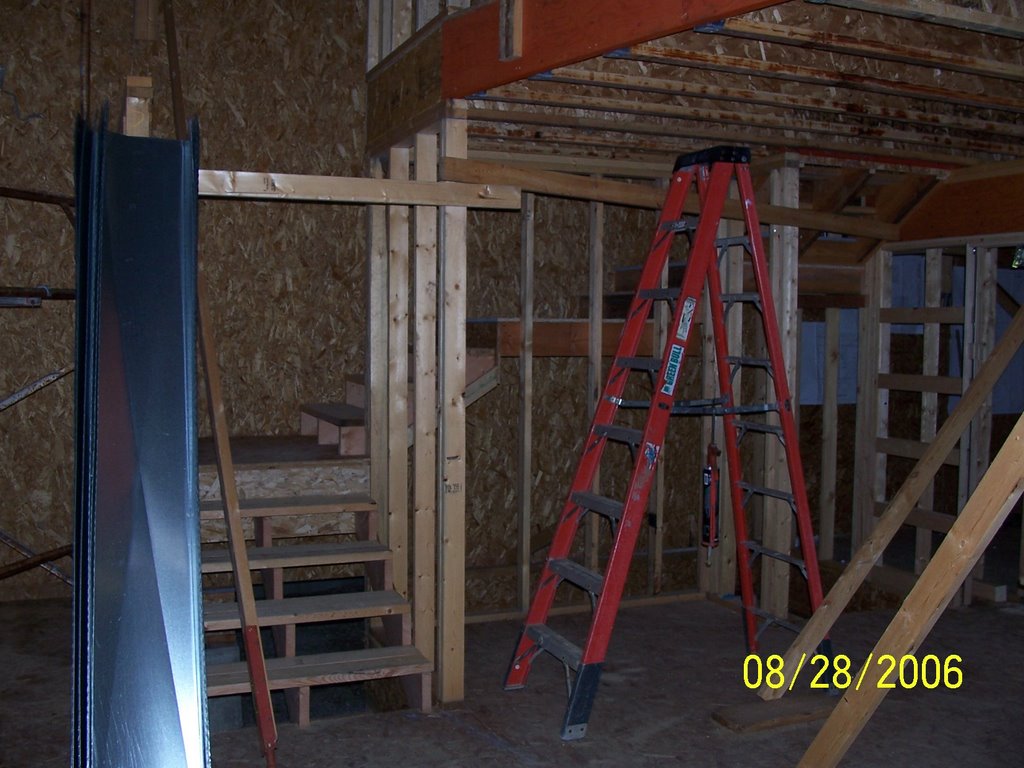
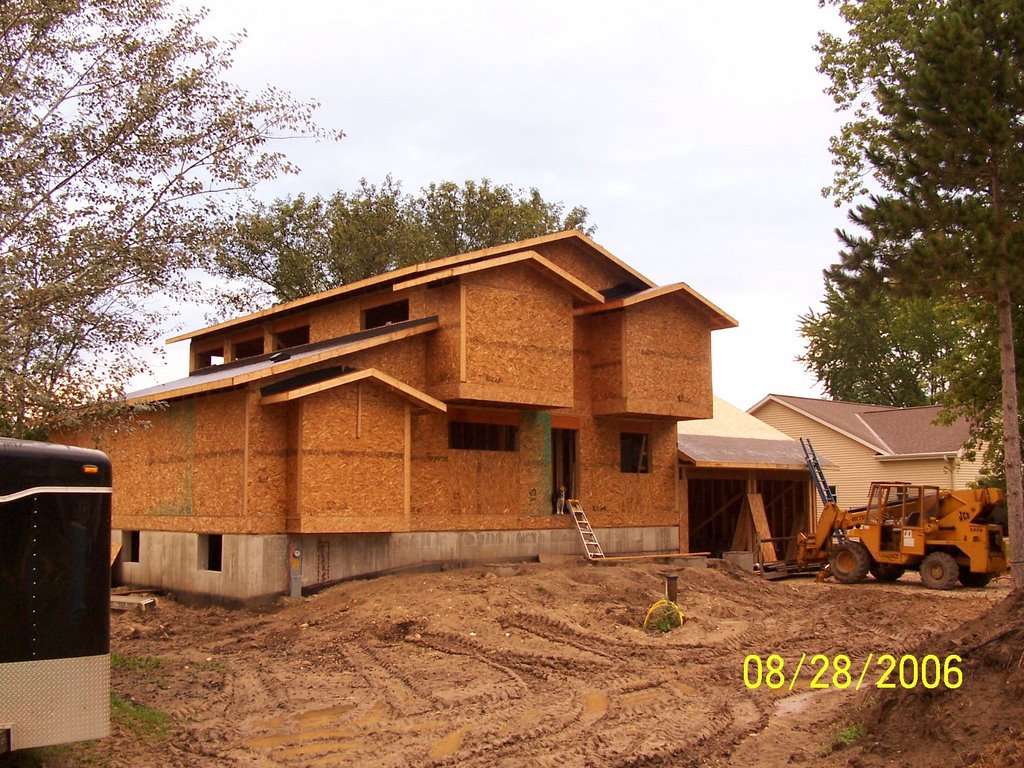
Gables and Stairs


Not a lot of major stuff lately, but things are moving ahead.

The HVAC rough-in started today, and we finished the stairs from the first to the second floor. Those were a real head-scratcher because of the landing and doorway that will go through to the bonus room.

The distance from the first (finished floor) to the landing was divisible with a 7" rise. The distance from the landing to the second finished floor was divisible by 6-5/8". Not the best way to do a set of stairs, but it seems to be OK.

My thought was that a slightly shorter step up after a landing (going up) would be safer than a taller step. Further, on the way down and after the landing, the slightly longer step down does not seem noticeable. I am going to post this over in the Breaktime forum at the Fine Homebuilding website to see what some experts say.

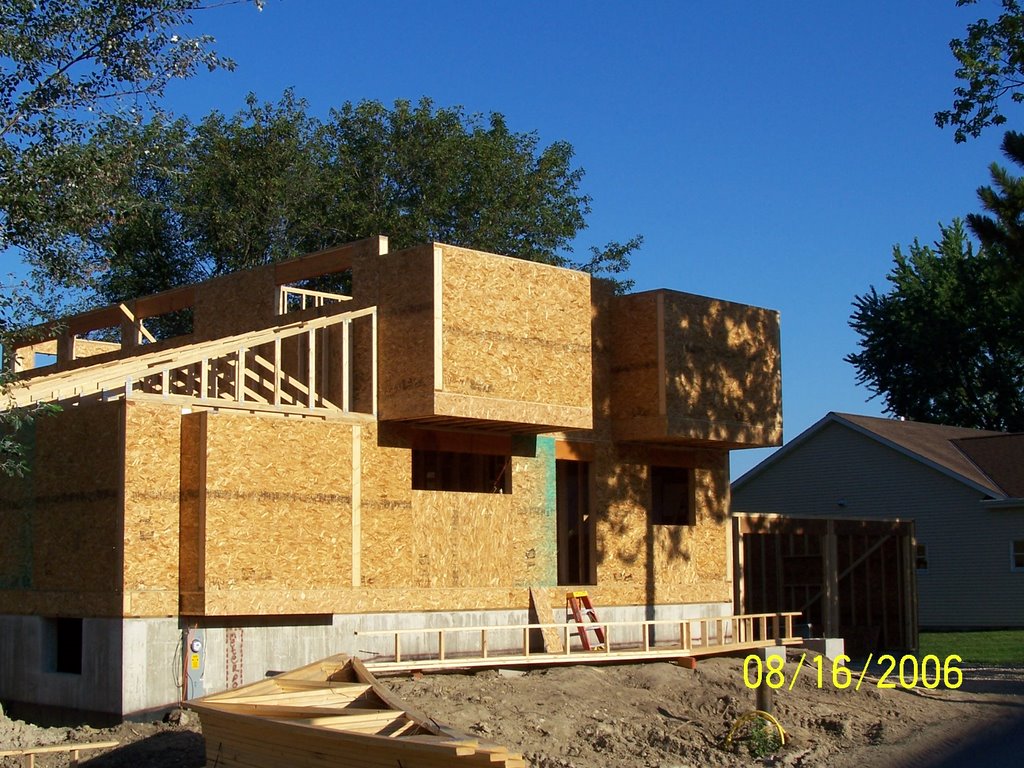
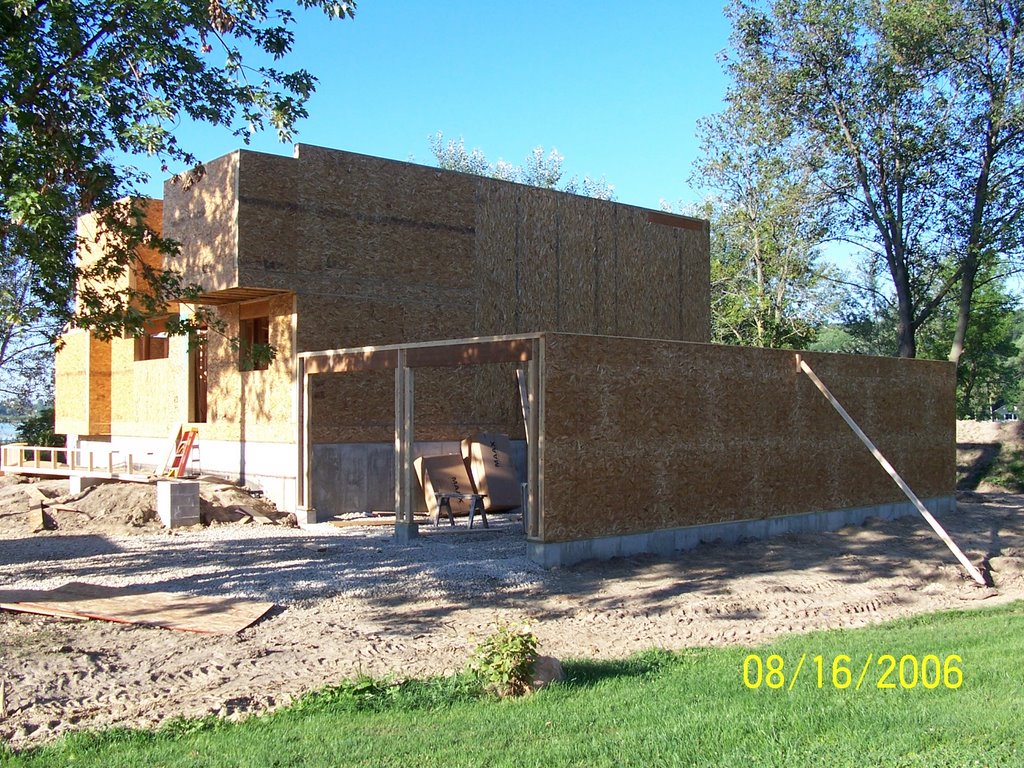
Wednesday, August 16, 2006

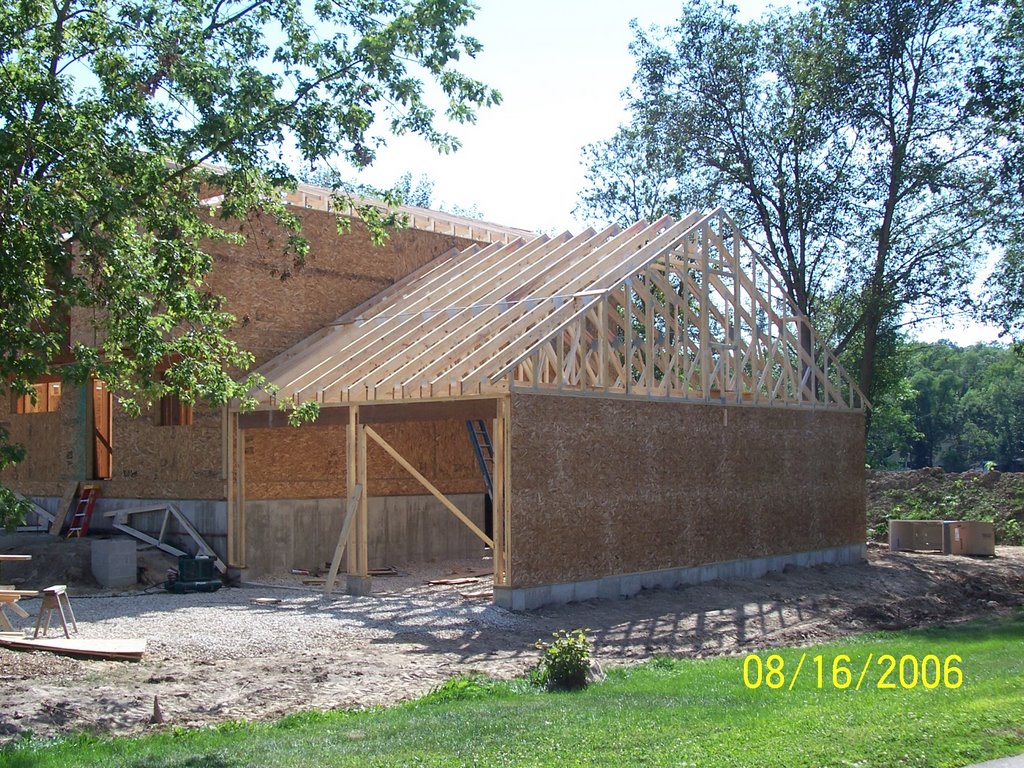
Trusses


Not much to say about this one. It was a long day, but I'm not complaining since we had a crane. The rafter tails are not long enough so we will be scabbing on some extensions prior to sheathing. They plan on completing most of the sheathing by Friday.

Sunday, August 13, 2006

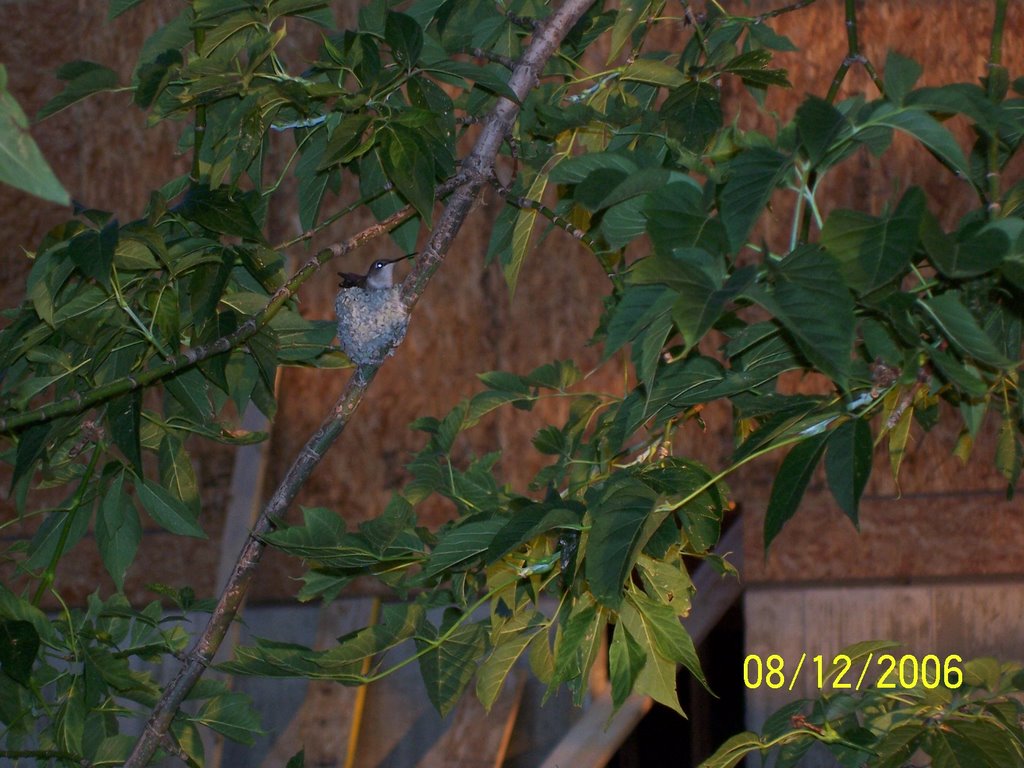
New Site Supervisor


This little hummingbird built a nest not 6' off the ground and 20' from the house. The wife was the first to spot it. We think she's sitting on some babies.

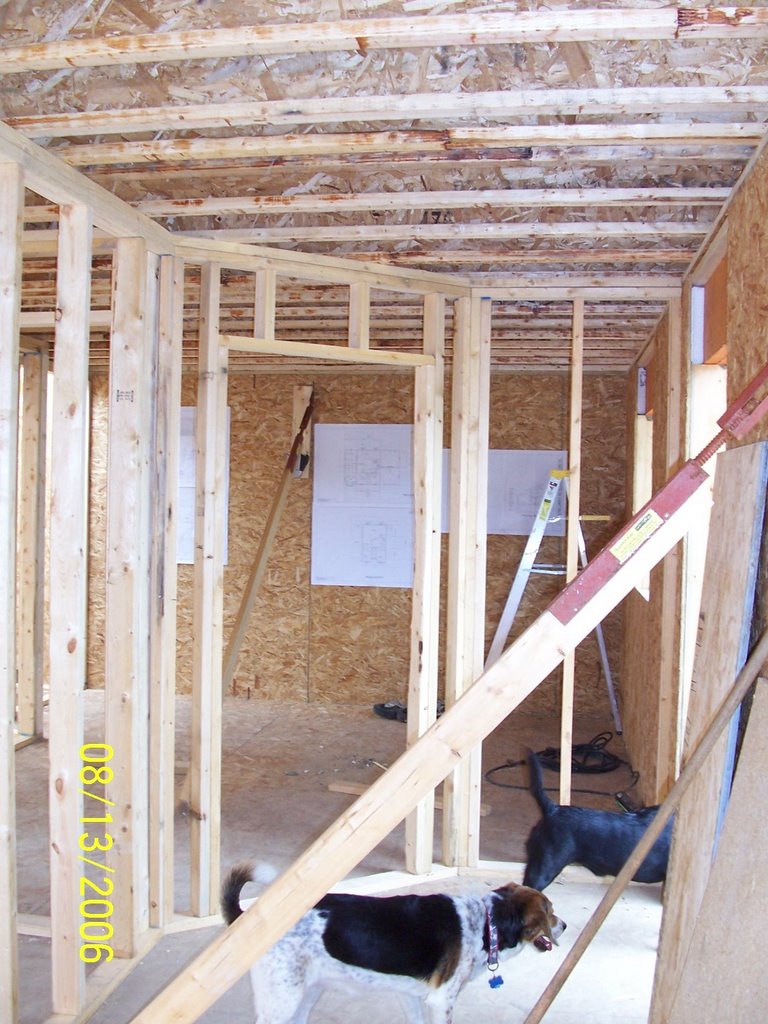
More Interior Walls


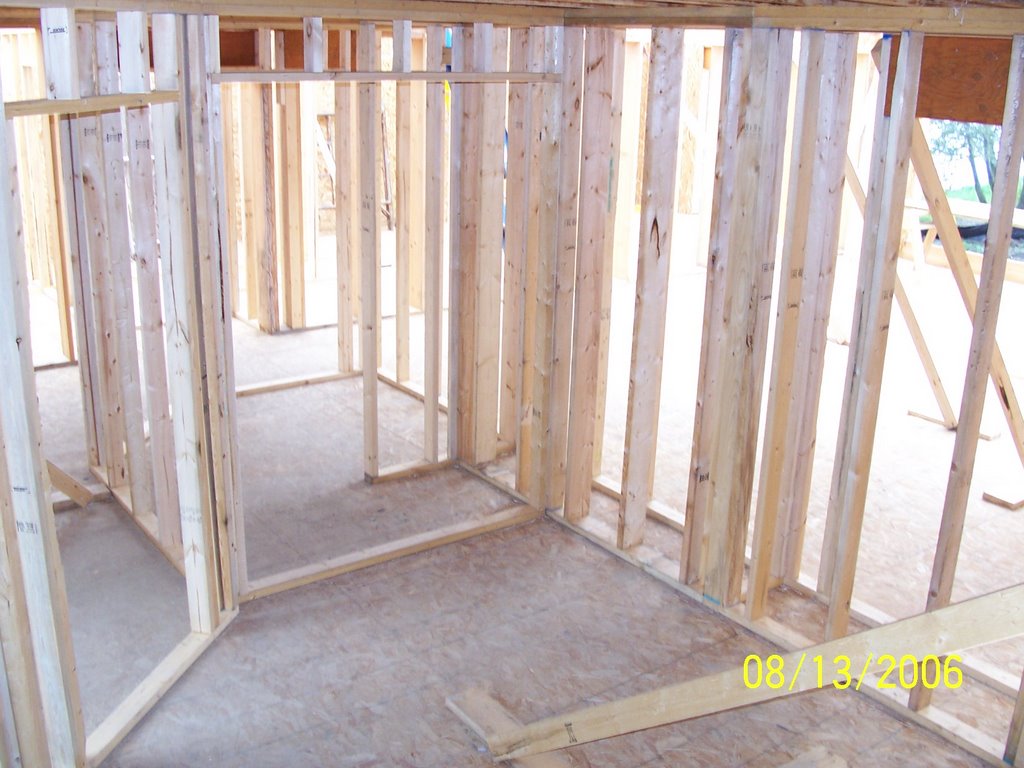
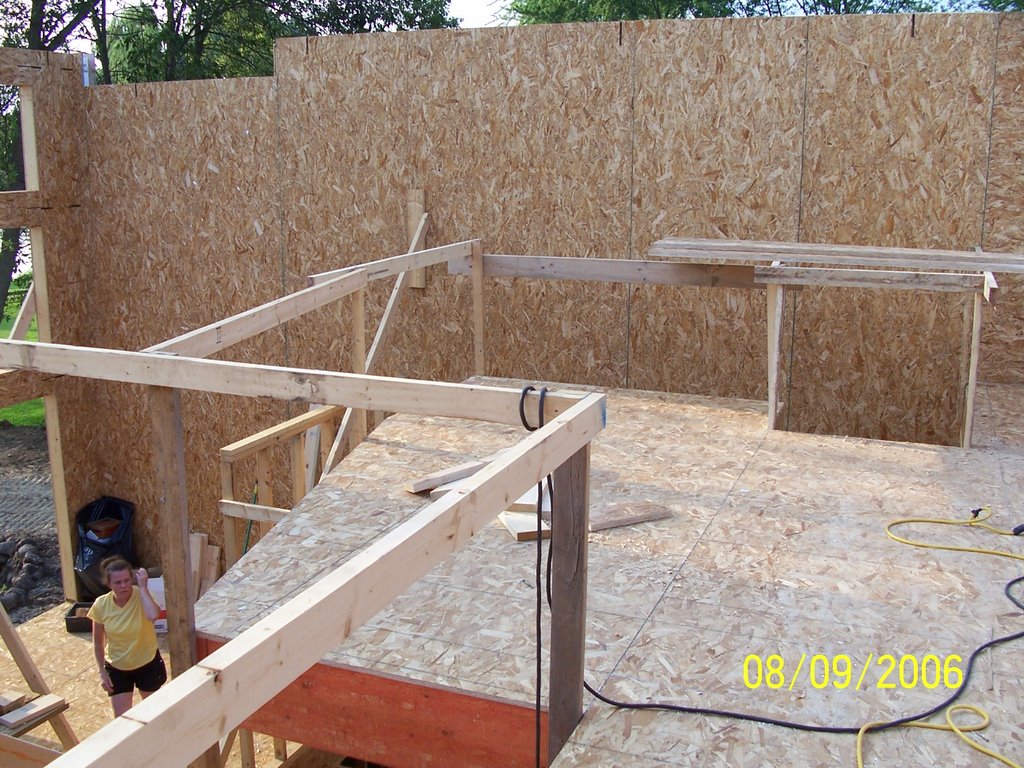
This just about does it for the interior walls. The wife and I finshed the interior walls by building the walls for the office, powder room, and her closet on the first floor, and the bedroom and bathroom walls on the second floor.

The picture with the dogs shows the foyer and the door to my office. The dogs are looking out the front door and the powder room is on the other side of the wall on the left side of the picture.

The picture that looks like a jumble of studs is taken from the office looking back towards the powder room (there is access to the powder room from the office via a pocket door, or the hall via a regular hall). You can also see in that picture the small pantry and the HVAC chase.

The picture taken from above the top plates is the upstairs bedrooms and the bath they share (and a nice view up the bay)

This week the crew will finish framing the garage walls (those are being built conventionally) and get ready for the trusses and crane on Wednesday.

Check back Thursday.

Friday, August 11, 2006

Anybody out there?

I know that we have some family and friends checking out this blog, but I am curious who else is out there. I put a sitemeter counter up and I see that folks from all over the world have clicked over for a look-see (Cool!).

I am guessing that most click over from the updates I put on the Breaktime Forum over at FineHomebuilding.com. If you've been checking this site on a somewhat regular basis or just clicked over from Breaktime, Thermomass, or where-ever, click on the small "X comments" link at the end of every post and let me know.

Lurking is allowed, but if you have any questions about what I am doing or why, ask away.

We hope to wrap up the interior walls this weekend.

Thursday, August 10, 2006

Interior Shots with the Second Floor now up


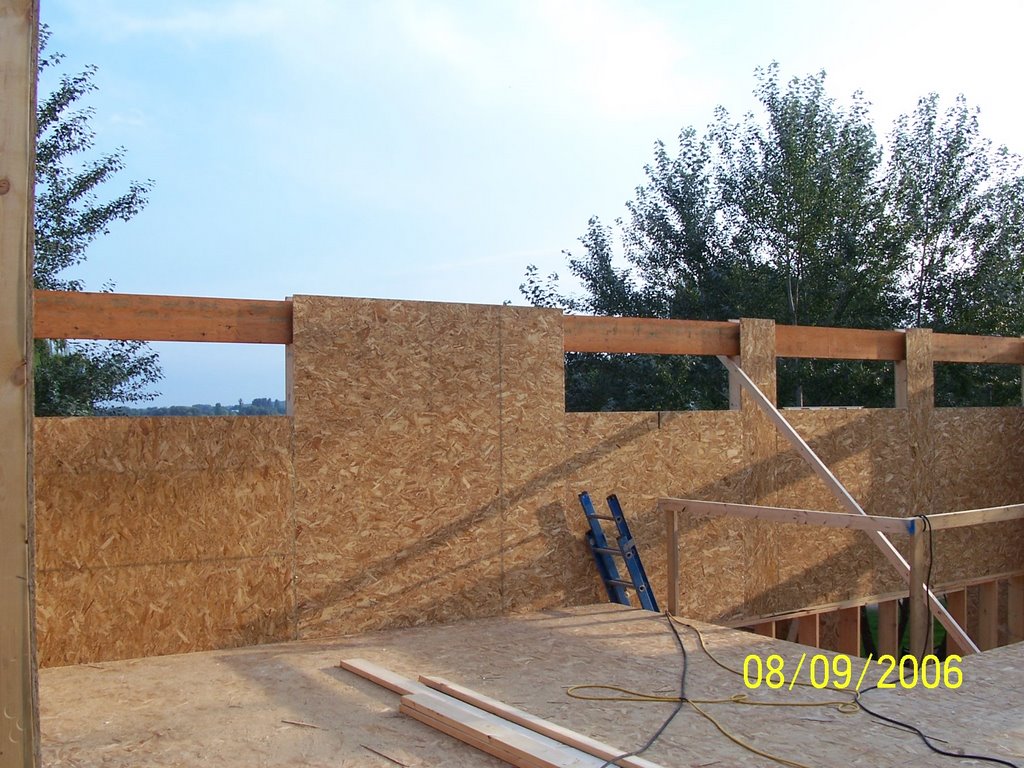
These pics show the clerestory windows from the inside. (Those openings are actually for 2 windows each). The three on the right are high up on the wall in the great room. The one on the left is in one of the upstairs bedrooms. That picture was taken from what will be the other bedroom and through where the upstaris bath will be (Since there are no interior walls on the second floor yet)

The other two pictures show the loft/balcony from above and below. The stairs come up there and the area below the loft defines the kitchen.

3 Days Later, a Second Floor


They put down (up?) the second floor deck on Monday and Tuesday. On Wednesday, they stood up all of the second floor walls.

The headers for the clerestory windows were installed before they put up those panels. The windows on the three bumpouts (and one in-between the two upper bumpouts) will probably be cut out and bucked today.

Sunday, August 06, 2006

A Weekend's Worth of Interior Walls


A friend from work came over Satuday. He helped me with the two main load bearing walls. It took him, my wife, and I to raise the big one. The reason that the one wall is made from 2x10's is because it will support a SIP above, and a run of trusses over the master suite. The 2x10 gives us the width we needed. Also, the studs in that wall are 24"oc and layed out so the trusses fall above each stud. In any event, getting those walls raised was the main goal for the weekend.

The next day; however, the wife and I made a bunch more progress. We did the rest of the layout and cut the bottom and 2 top plates for all of the first floor walls. We even got a few more of the smaller walls up, too. Mainly some short walls in the powder room that tie into the pantry and HVAC chase.

The goal for this week is to get the second floor deck and walls up and be ready for the trusses.

Friday, August 04, 2006

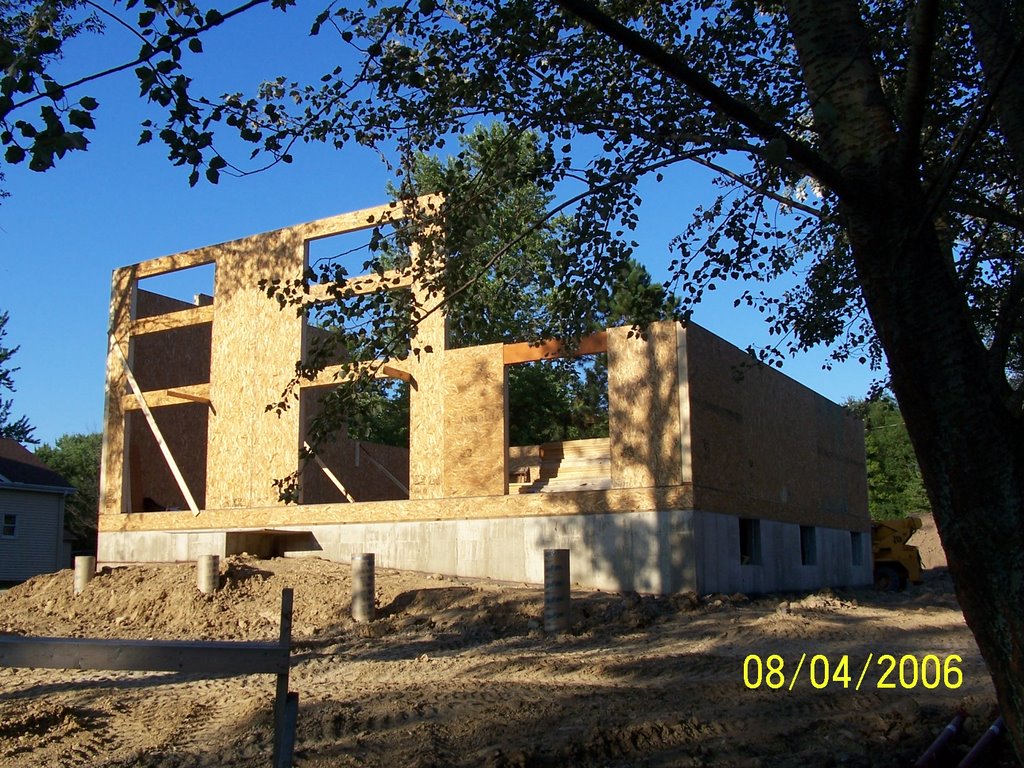
Tall First Floor Walls


(Wow!) Now we can really get an idea of how the great-room is going to look. The tall windowless wall on the right in the interior shot will get some windows later. You can see the open spot at the top which will receive the header. The big window wall is topped by a gable. We spec'd that truss as "load bearing" so we could get away with the long SIP headers.

We are going to work over the weekend to get two main interior walls up so they crew can work on the second-floor deck on Monday.